2.4. Change Log
The Change Log tracks changes and impacts of changes within the SCRP.
This guide shows how the PIU can:
Enter new change requests
Edit change requests
Delete change requests
Search, sort, and filter the change log
Export the change log
2.4.1. Accessing The Change Log
Use the link below to access the Change Log via KoBoToolbox:
Below are the groups of users can access the Change Log. You can find detailed information about users here: Users With Access to Data Collection Tools
User Group |
Can View Data |
Can Add Data |
Can Update Data |
Can Delete Data |
Can Export Data |
|---|---|---|---|---|---|
MIS Administrator |
Yes |
Yes |
Yes |
Yes |
Yes |
IPs |
Yes |
No |
No |
No |
Yes |
PIU |
Yes |
Yes |
Yes |
No |
Yes |
World Bank Group |
Yes |
No |
No |
No |
Yes |
2.4.2. Submitting New Change Requests

IPs should first access the Change Log by:
Visiting the KoBoToolbox Change Log URL.
Logging in by entering the username and password shared by the PIU and hit submit button
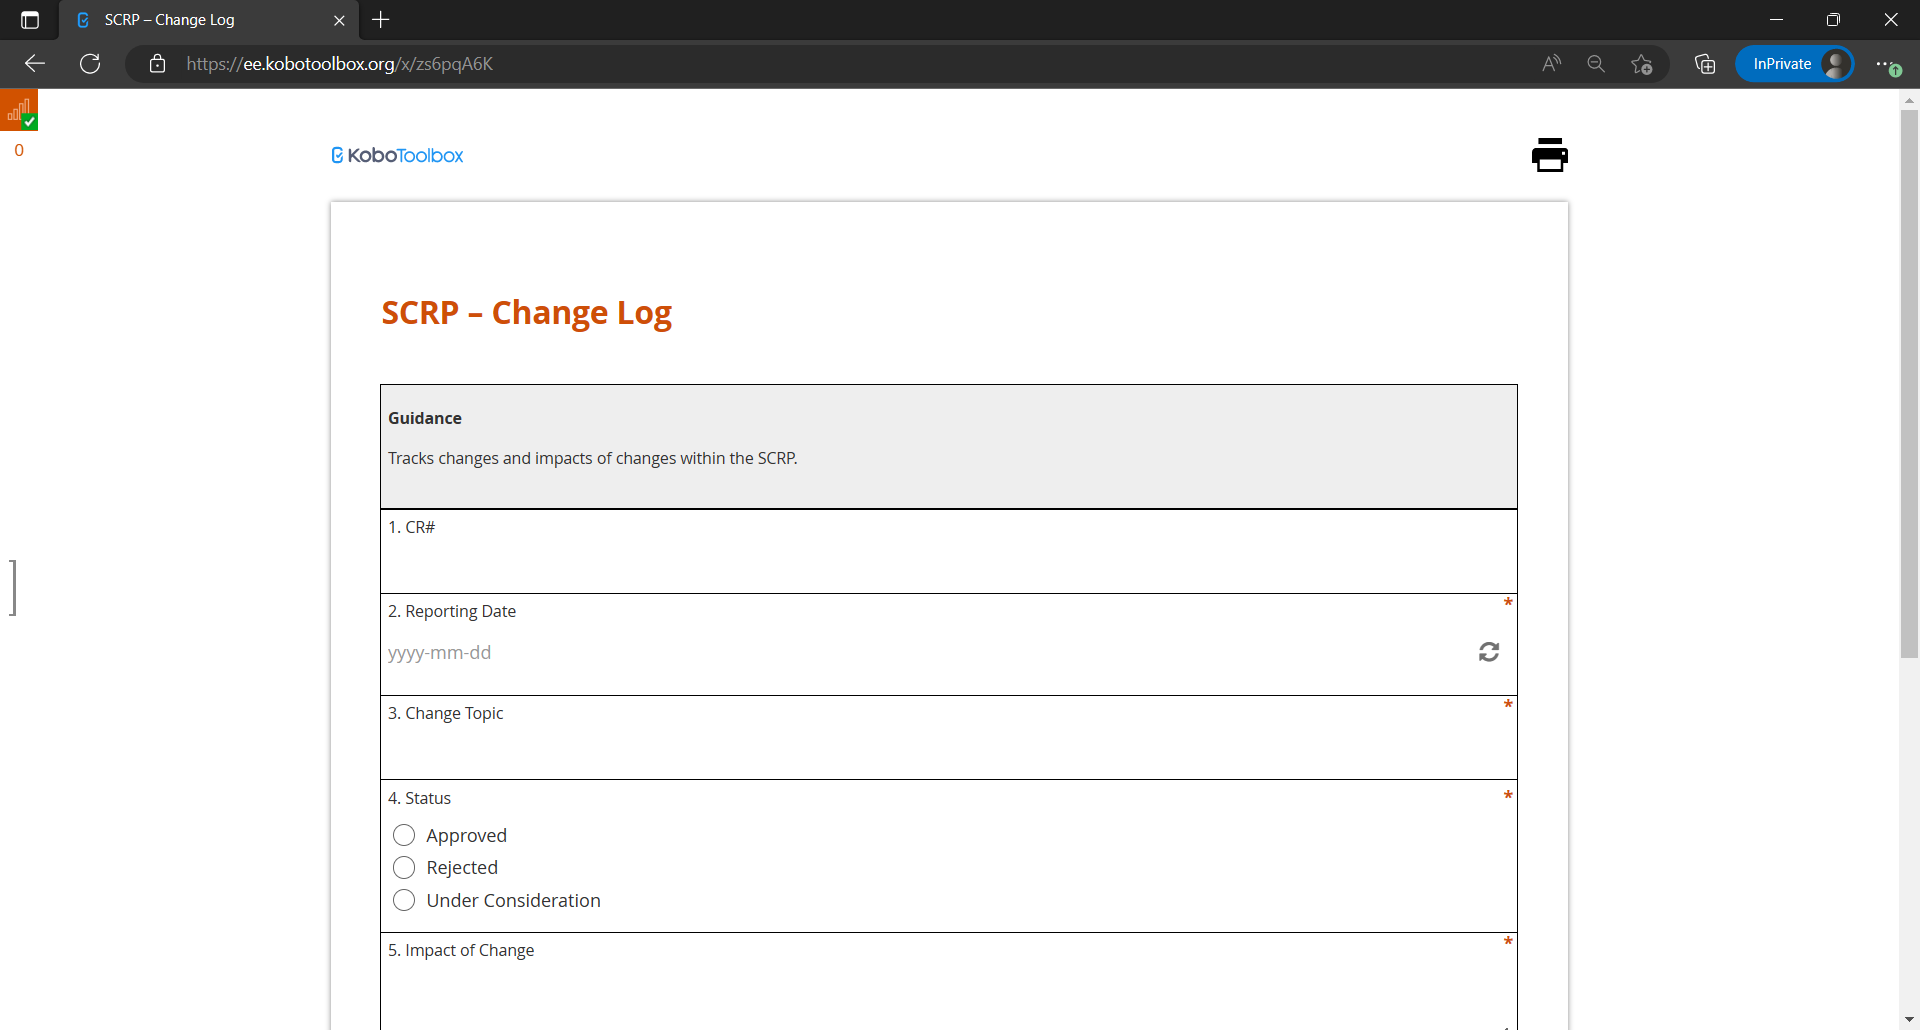
IPs should then fill in the mandatory fields with details regarding the change log:
CR#
Reporting date
Change topic
Status
Impact of change
Plan baseline ref
Link to change request form (URL)
NB: Please note that it may take up to 24 hours for the submitted data to appear on the dashboard.
2.4.3. Editing Change Log Records
IPs can edit their change request logs on KoBoToolbox in case of any errors made during data entry. This can be done in four steps:
Access the KoBoToolbox Portal
Locate the deployed SCRP Change Log KoboToolbox form
Locate the change log record by ID and edit it
Submit the edited record
2.4.3.1. Access the KoBoToolbox Portal
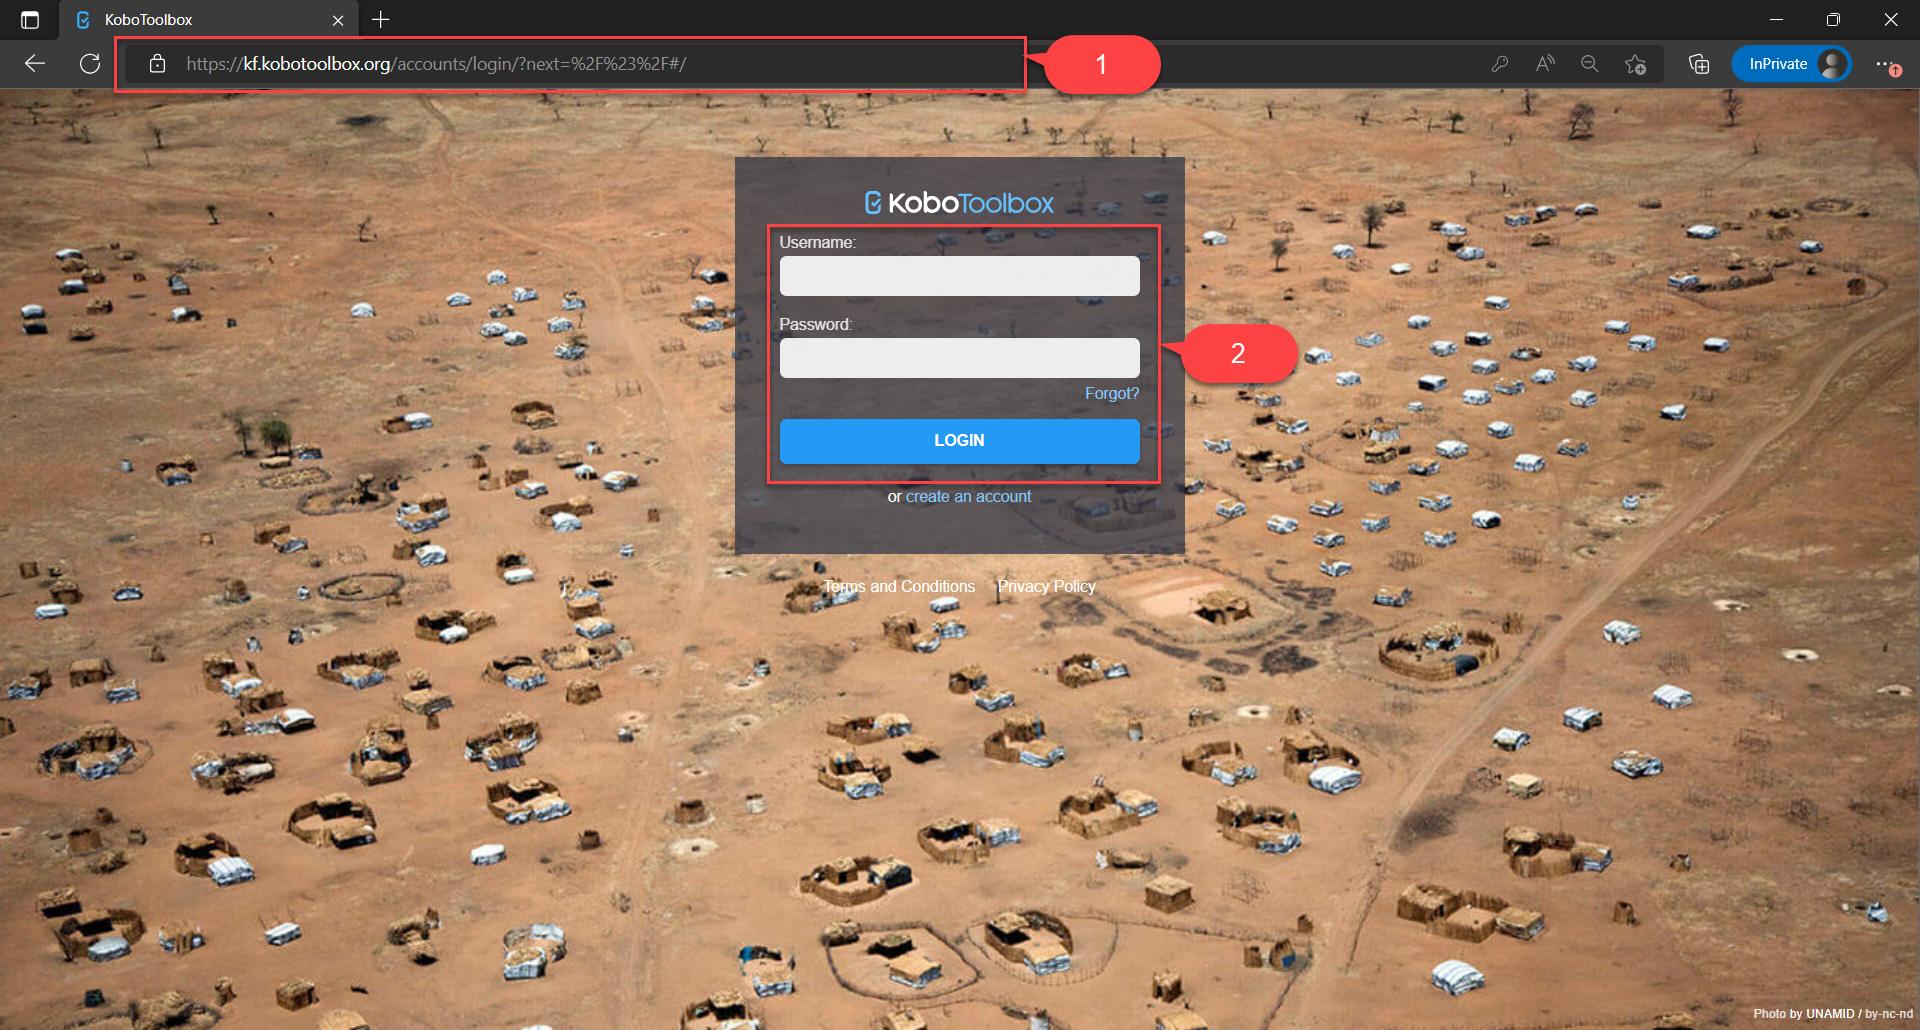
Access the KoBoToolbox Portal via this URL
Login by entering the username and password shared by the PIU and hit login button
2.4.3.2. Locate the SCRP Change Log Form

Under deployed projects, click on the SCRP - Change log
Select the Data tab to view all records that had been previously submitted
2.4.3.3. Locate & edit the record

Locate the change log record by the CR# in the data table
Click on the edit icon to open a new tab and amend the record
Hit the submit button at the end of the form to save the edited record
2.4.3.4. Validating a record
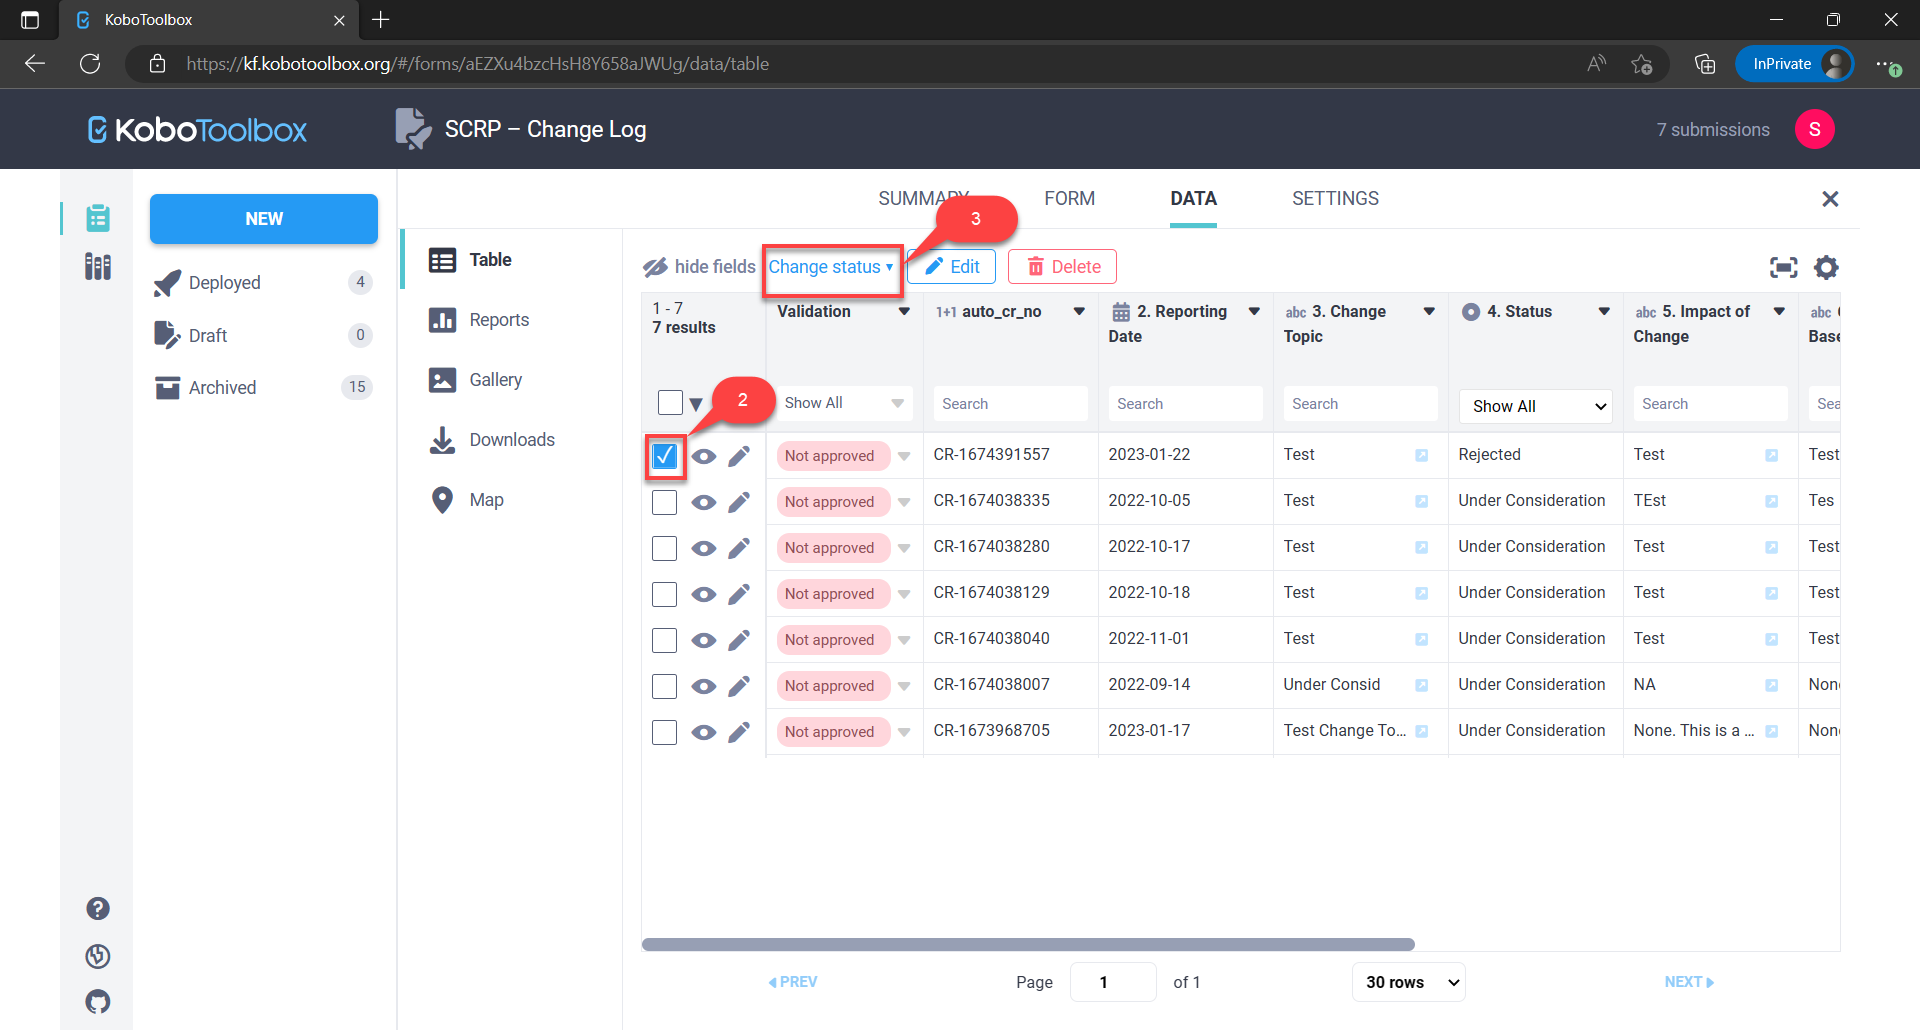
Locate the change log record by the CR# in the data table
Select the record you want to validate by clicking the checkbox against it
Click the change status button and select “Set status: Approved” to open a pop-up modal
Confirm validation by clicking the “UPDATE VALIDATION STATUS” button to validate the record
2.4.4. Deleting Change Log Records
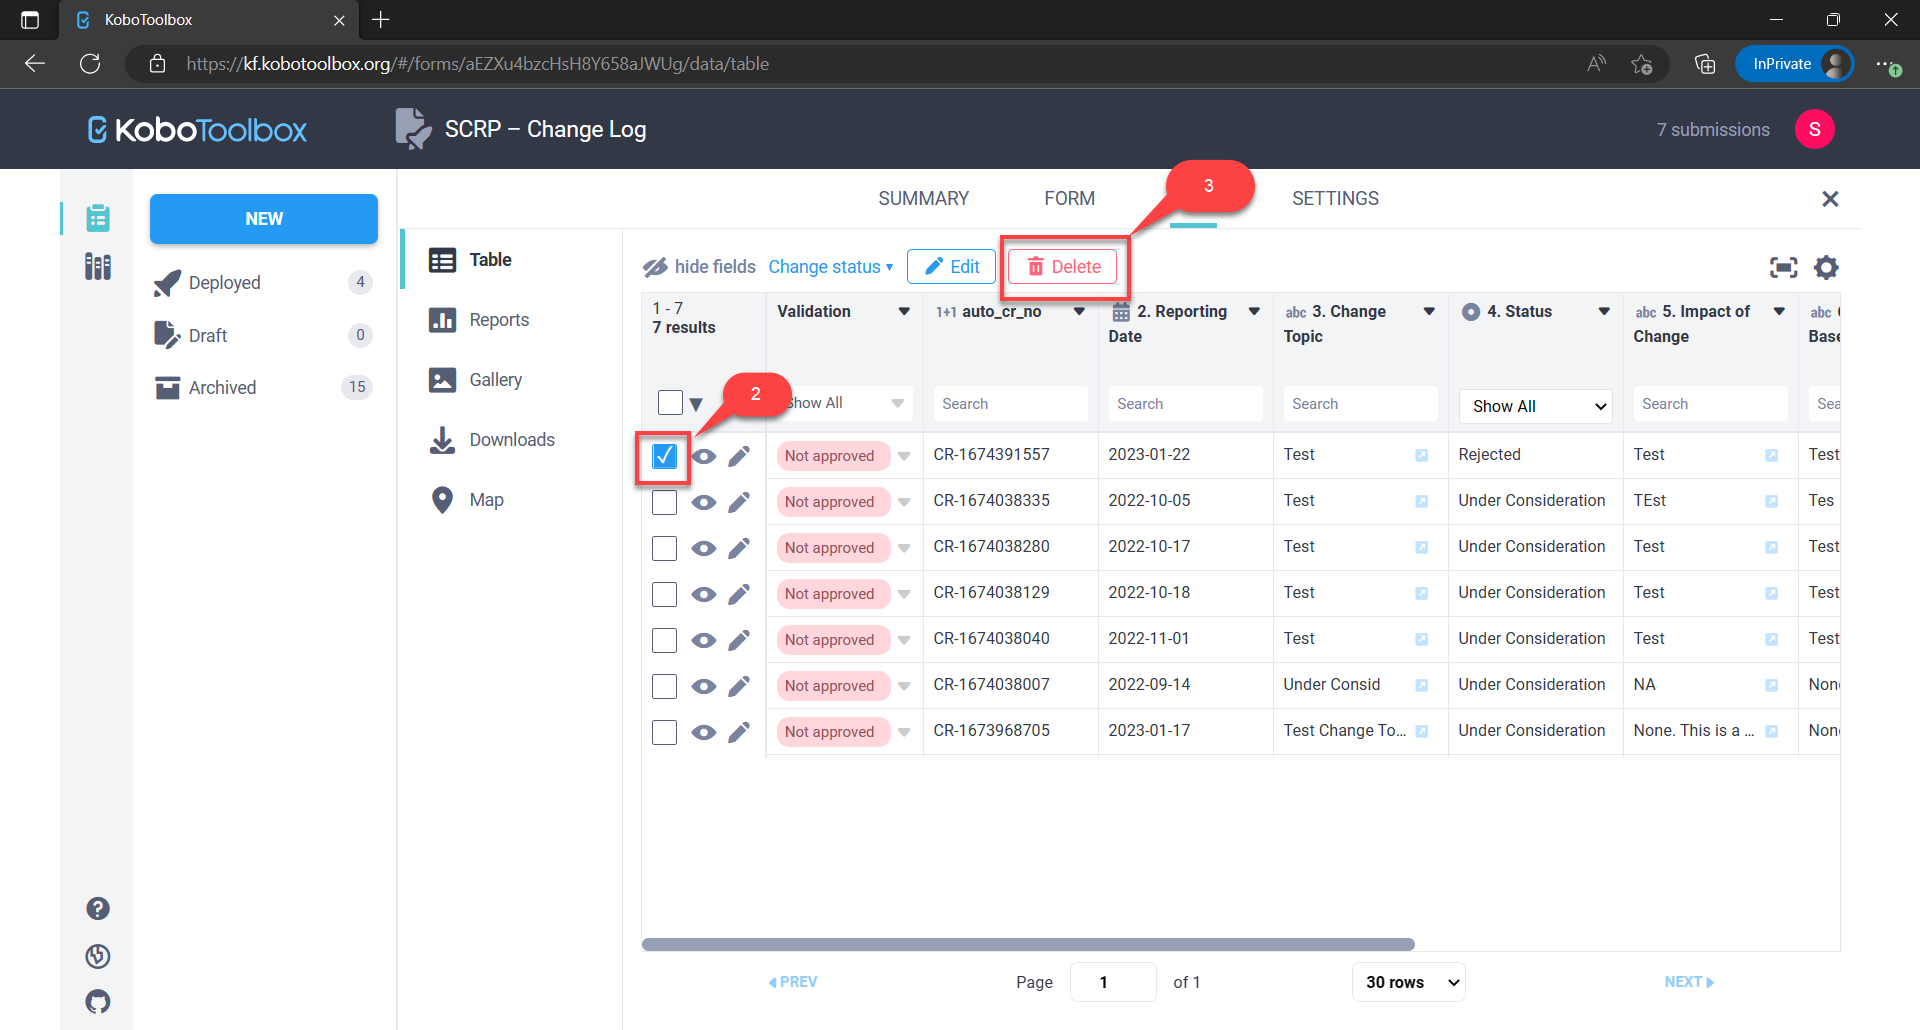
Locate the record and select it by checking the checkbox
Click the “Delete” button
Confirm deletion and click the “Delete Selected” button to delete the record/s
2.4.5. Searching, Sorting, and Filtering Lesson Log Records
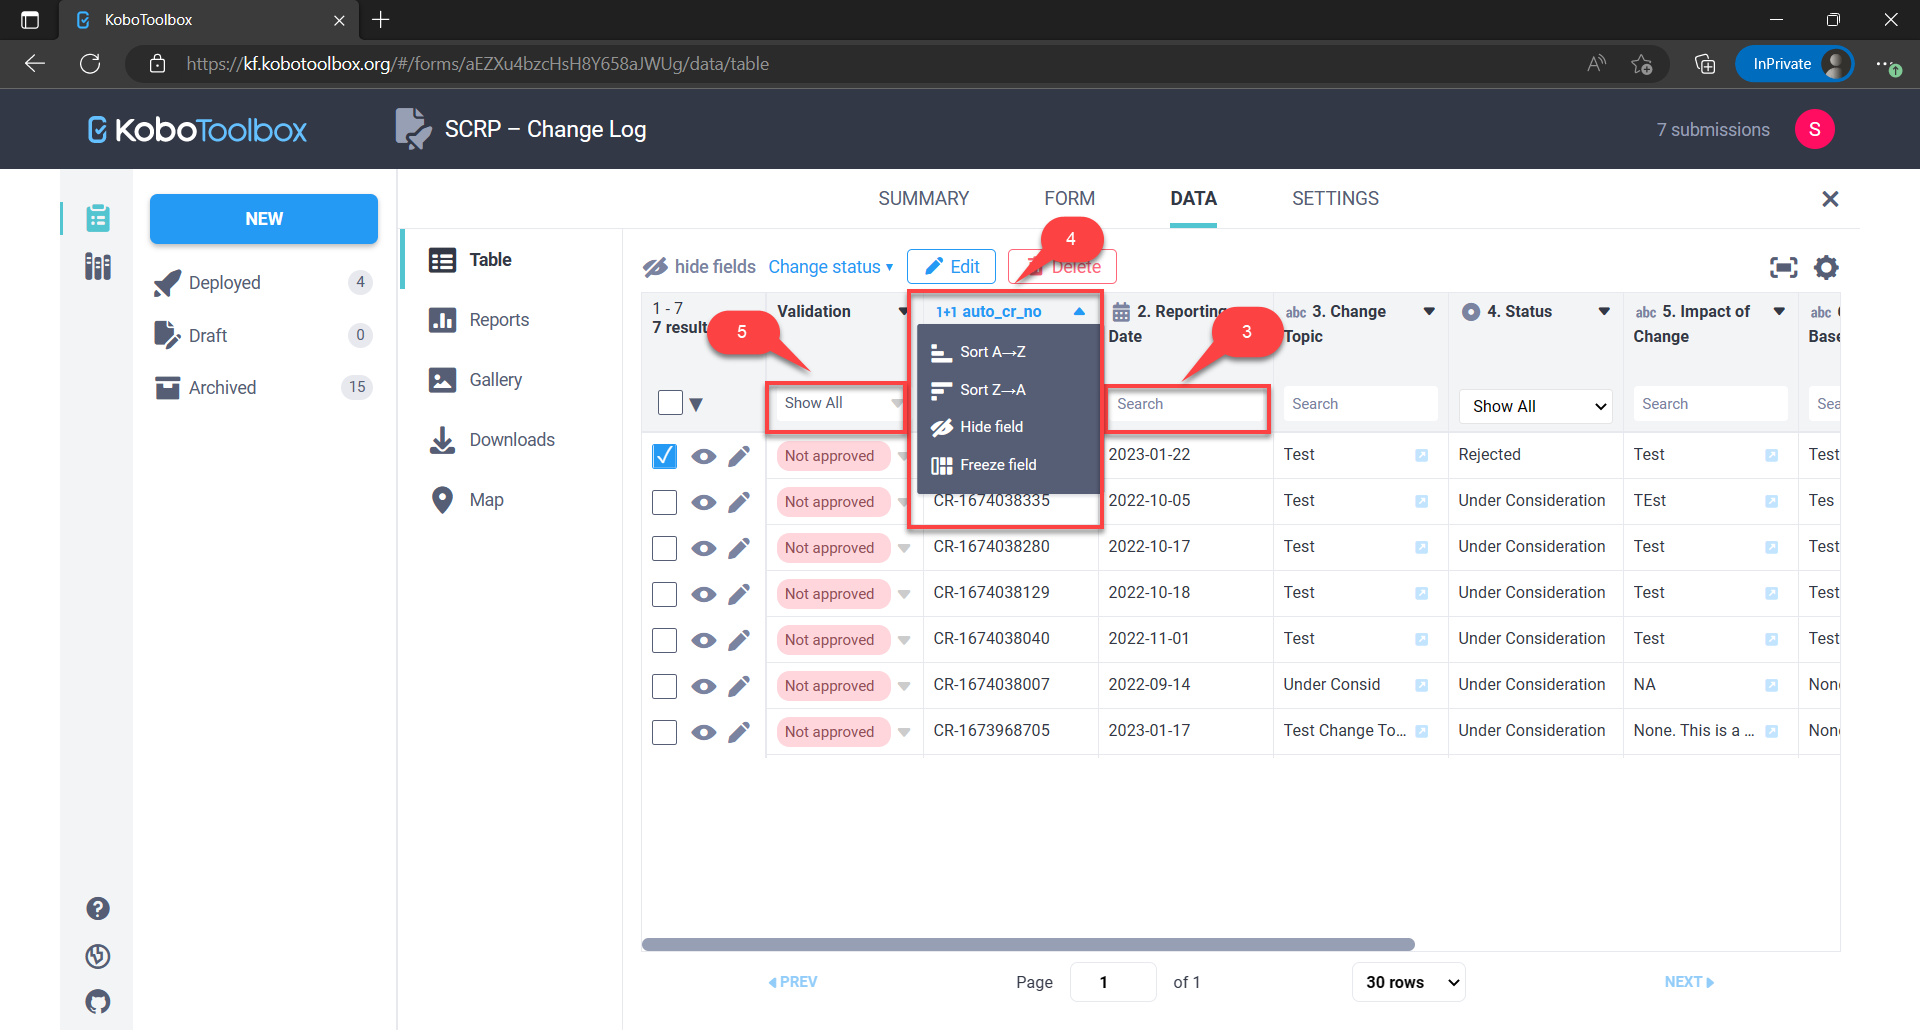
Search a column by typing your query in the search fields
Sort a column by clicking its title and selecting the type of sorting
Filter a column by selecting its “Show All” drop-down button
2.4.6. Exporting Change Log Records

Select the “Downloads” tab
Choose export options e.g. export type - XLS, CSV, GeoJSON, SPSS, ZIP (Media Attachments)
Ensure the default export settings (Official Data Export) is selected
Click the “Export” button to initiate the export (takes a few seconds)
Download the data by clicking the “Download” button